
{Nifty Thrifty Denim Rag Quilt Tutorial Part 2}
{Nifty Thrifty Denim Rag Quilt Tutorial Part 3}
{Nifty Thrifty Denim Rag Quilt Tutorial Part 4}
Part 5
Now that you have all the rows to your quilt sewn together, it's time to move on to sewing around the outside edges of the quilt.
On my quilt, I just used a straight stitch and sewed all the way around the edges on all sides. I used the same seam allowance I had on the rest of the quilt: about 1/4 an inch out past the foot on the machine. You could double stitch if you wanted, but I didn't. When I came to a seam I would spread it out allowing 1/2 to go to one side and 1/2 to go to the other side.

Now that you have your seam all the way around the outside, it is time to pull out those snips and start snipping! I went around the outside first. I snipped about every 1/4 inch. Be sure not to snip your stitching. That would be bad.
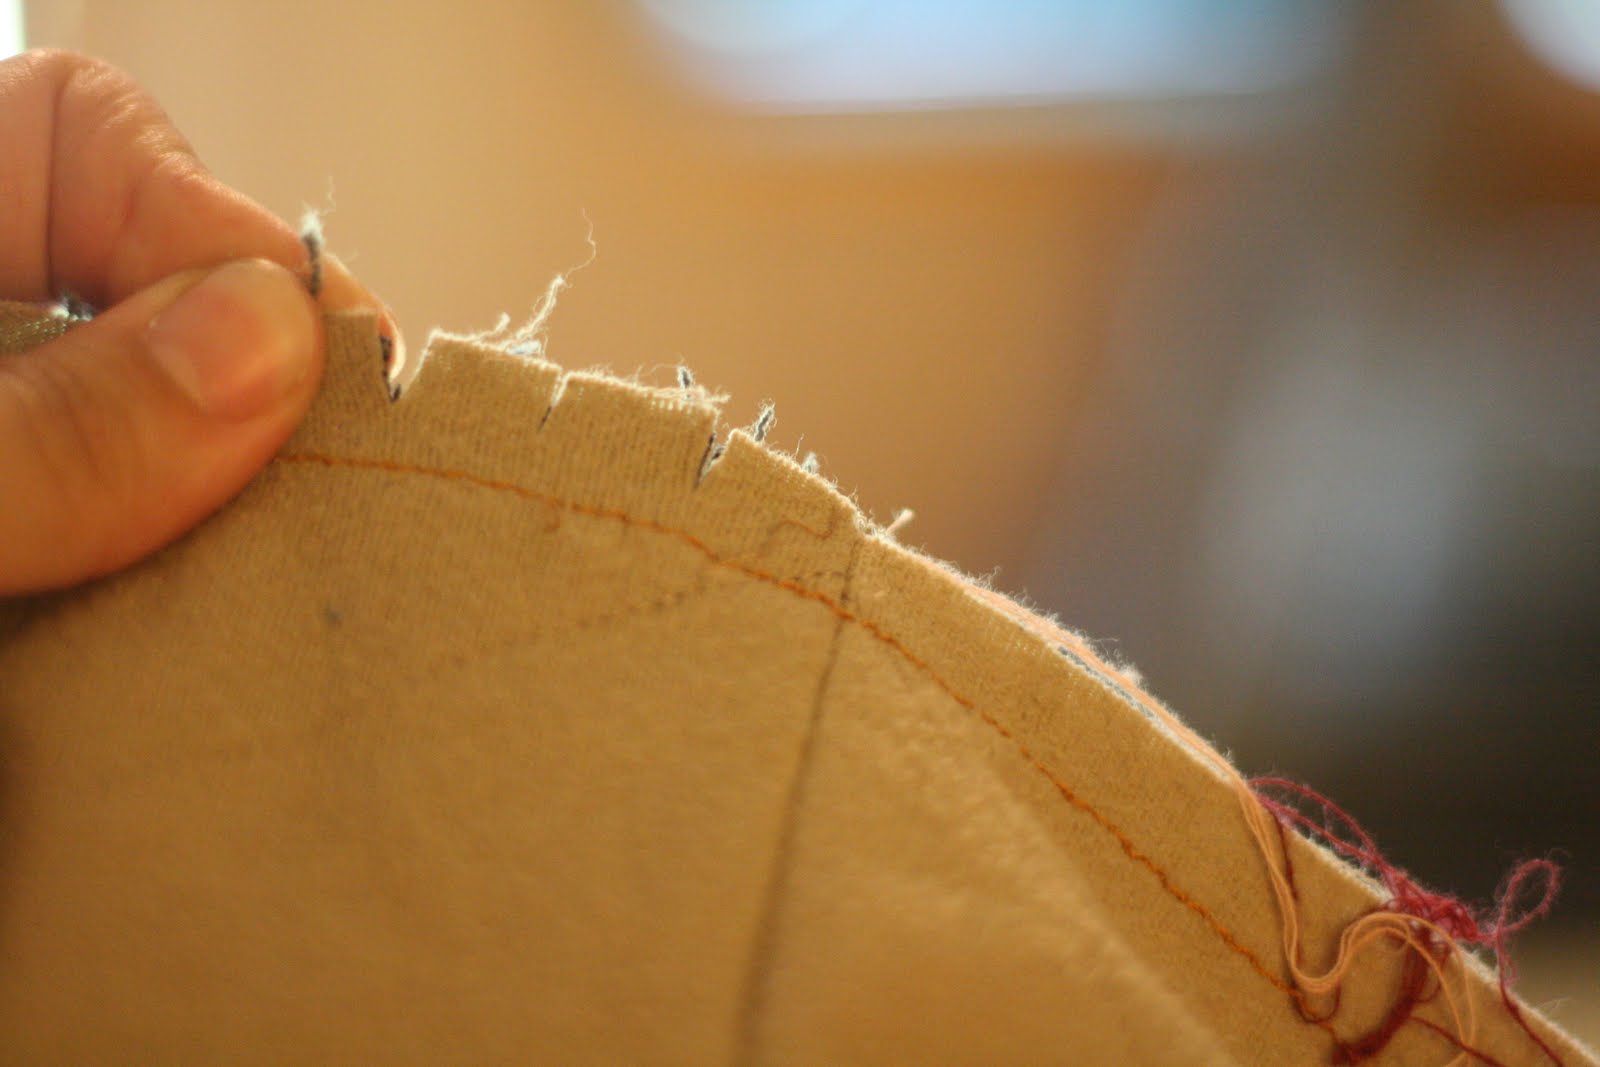
When you run into the seams that have ends going in opposite directions {one side sewn pointing up and one side sewn pointing down}, don't panic. Simply snip about 1/8 inch from the stitching on both sides.


I would advise you to go to a laundry mat and use a LARGE machine. Your quilt will be heavy and there will be tons of strings. You wouldn't want to destroy your machine. Better to be safe than sorry.
I will post a pic of my finished quilt in {Part 6} as soon as I get a chance to run out to the laundry mat and wash it.
Good luck everyone! I can't wait to see your results!
No comments:
Post a Comment