Showing posts with label Denim. Show all posts

Monday, December 26, 2011

Old Fashion Tacked Denim Quilt


I've been working for several months on a quilt for my Dad. He has told me many times that when he was a boy he loved his denim quilts. So, I decided to make him one and give it to him as a Christmas present.

I managed to finish the quilt in time, it didn't cost me a single cent, and he loved it!

I used recycled denim {from every closet in my extended family} and backed it with a flannel sheet that my sister gave me. It really didn't need batting as it was very heavy. Eight pounds! I already had the thread to tack it with as well. I made sure to use a sheet big enough to fold over for the binding because it is just easier for me to do it that way.

How'd it turn out?


Monday, June 6, 2011

Denim and Homespun Rag Quilt Tutorial Part 6

{Nifty Thrifty Denim Rag Quilt Tutorial Part 1}
{Nifty Thrifty Denim Rag Quilt Tutorial Part 2}
{Nifty Thrifty Denim Rag Quilt Tutorial Part 3}
{Nifty Thrifty Denim Rag Quilt Tutorial Part 4}
{Nifty Thrifty Denim Rag Quilt Tutorial Part 5}

Part 6
 
Wow, guys and gals! We made it!!!
 
When I thought I had all the seams of my quilt snipped, I laid my quilt down on the floor in the living-room and went back over every seam again, one by one, to be sure I hadn't missed any.
 
I then threw the quilt in the washer. I set the washer to super load, heavy dirt, and cold water... simply because I hate to pay for hot water.
 
OMG! The strings. I knew it would be bad, and I needed to go to the laundry mat, but it just wasn't working out for me since the closest one is about 20 minutes away. Once the machine had spinned out the wash cycle I opened the lid and wiped the strings out of the machine. Then after the rinse cycle I had to do the same. There were handfuls of string. Take my advice... go to the laundry mat!
 
Now that the quilt was washed, there were 50 million strings covering every square inch of the quilt. I took it out on the porch and shook it about a thousand times over the edge to get the strings off. Seriously I shook it til I thought my arms would fall off. It did a fair job, so I tossed it in the dryer. I set the dryer on auto cotton and optimum dry. Every 5-10 minutes I would go in and clean out the lint trap. Tons and tons of lint and string. I'd day I got a good 6 handfuls out before the quilt was dry.
 
Once the quilt was dry, it still had strings on it. I took the quilt back onto the porch and shook it some more, then again, and again.
 
Finally I brought the quilt back into the house spread it out on the floor and cut the excess strings off of both sides.
 
Here is the finished quilt:

I put the quilt on my son's twin bed just to take a picture. I'll get a better picture once the sun isn't so bright.

My quilt is made of 8.5 inch squares. 10 down and 10 across. I made it to be used on the couch, but it is a little wide. I could have went 9 down and 9 across to make it fit perfectly, but it is still nice. *IF* you were going to make one for a twin size bed I would probably do 12 down and 12 across.

So, there you have it! Whatcha think?

I hope you have enjoyed this tutorial, have learned a few things, and will share the photos of your quilts with me.
Have a wonderful day, God Bless!
Alana Jo

Denim and Homespun Rag Quilt Tutorial Part 5

{Nifty Thrifty Denim Rag Quilt Tutorial Part 1}
{Nifty Thrifty Denim Rag Quilt Tutorial Part 2}
{Nifty Thrifty Denim Rag Quilt Tutorial Part 3}
{Nifty Thrifty Denim Rag Quilt Tutorial Part 4}

Part 5

Now that you have all the rows to your quilt sewn together, it's time to move on to sewing around the outside edges of the quilt.

On my quilt, I just used a straight stitch and sewed all the way around the edges on all sides. I used the same seam allowance I had on the rest of the quilt: about 1/4 an inch out past the foot on the machine. You could double stitch if you wanted, but I didn't. When I came to a seam I would spread it out allowing 1/2 to go to one side and 1/2 to go to the other side.
You could fold the whole seam to one side or the other, but that is a lot of bulk. It would be a good idea to press the seam the way you want it to go with an iron before starting to stitch. I didn't, but about 1/2 way through I wished I would have. Sewing would have went a lot quicker and a lot smoother.

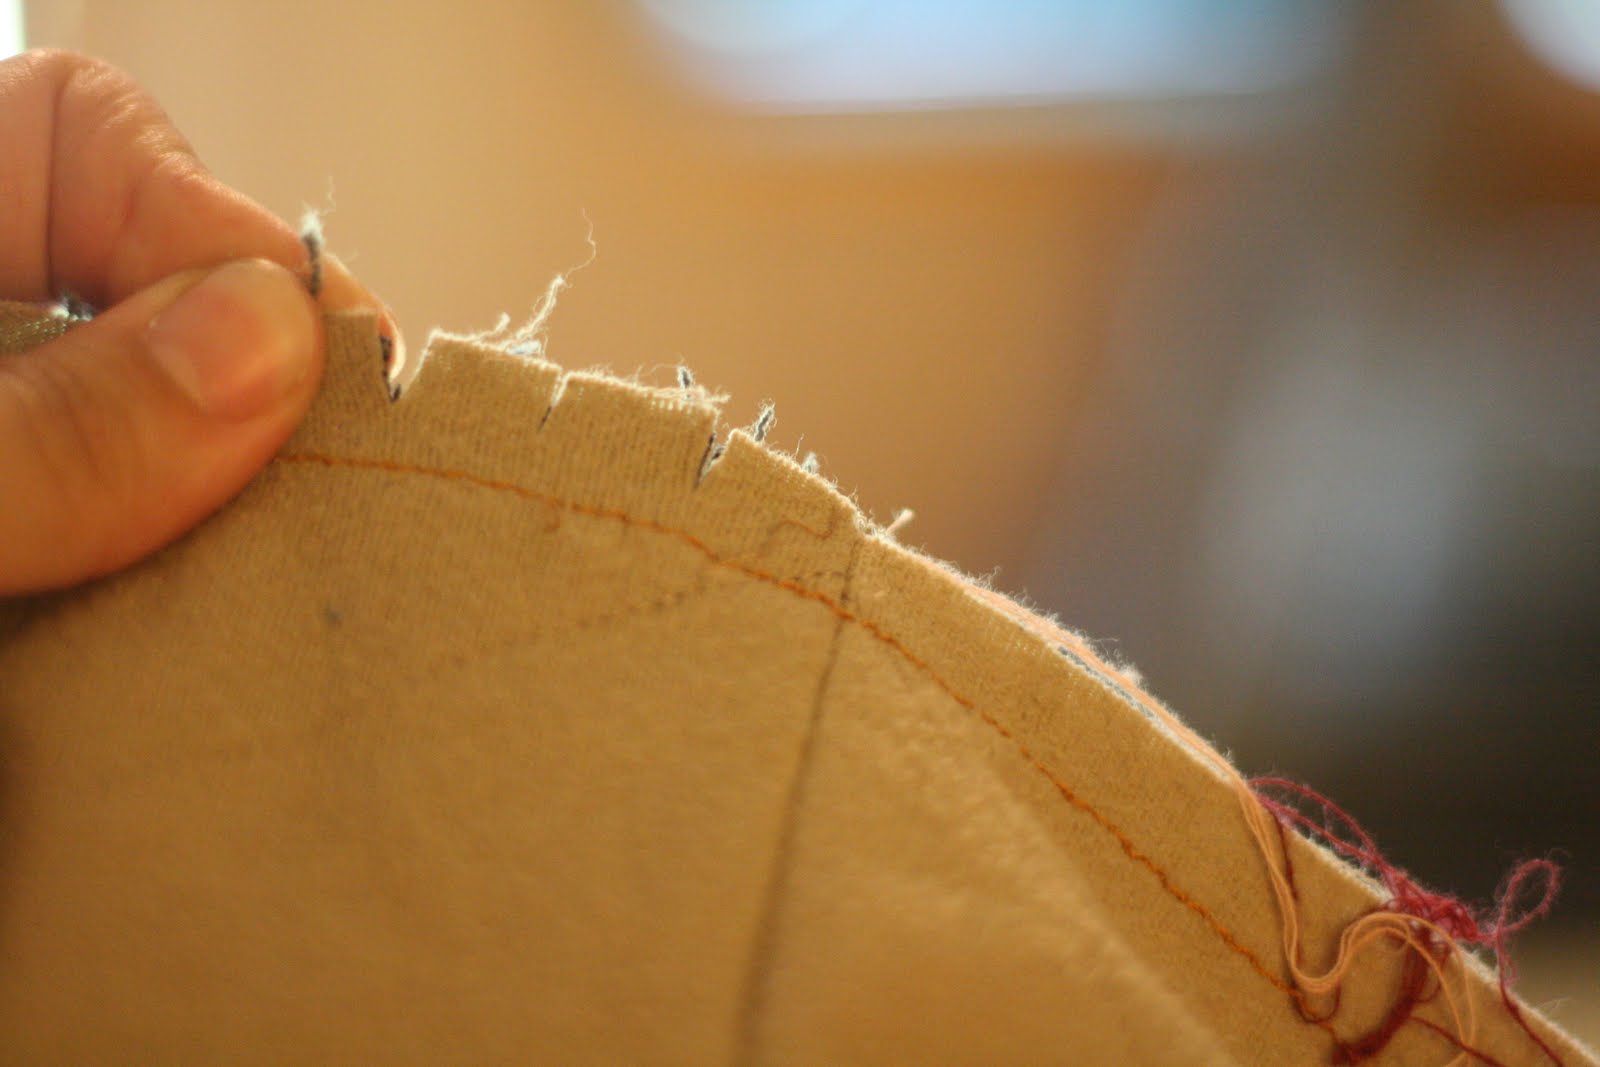
Now that you have your seam all the way around the outside, it is time to pull out those snips and start snipping! I went around the outside first. I snipped about every 1/4 inch. Be sure not to snip your stitching. That would be bad.
Once your finished with the outside edges, move to the inside. I did the horizontal rows first, then the vertical. It doesn't matter either way really. Just snip, snip, snip.

When you run into the seams that have ends going in opposite directions {one side sewn pointing up and one side sewn pointing down}, don't panic. Simply snip about 1/8 inch from the stitching on both sides.
This will allow the seam to free up. Then snip, snip, snip about 1/4 inch apart the rest of the way across.
Once you think you are finished with all the snipping, lay your quilt out on the floor and look it over really well to make sure. Once your positive, you have every seam snipped, you can wash and dry your quilt.

I would advise you to go to a laundry mat and use a LARGE machine. Your quilt will be heavy and there will be tons of strings. You wouldn't want to destroy your machine. Better to be safe than sorry.

I will post a pic of my finished quilt in {Part 6} as soon as I get a chance to run out to the laundry mat and wash it.

Good luck everyone! I can't wait to see your results!
 
{Nifty Thrifty Denim Rag Quilt Tutorial Part 6}

Denim and Homespun Rag Quilt Tutorial Part 4

{Nifty Thrifty Denim Rag Quilt Tutorial Part 1}
{Nifty Thrifty Denim Rag Quilt Tutorial Part 2}
{Nifty Thrifty Denim Rag Quilt Tutorial Part 3}

Part 4

Hey guys and gals! If you have made it this far; you rock. We have put a lot of effort into our quilt. I think I see the light at the end of the tunnel. 

Now that all of our rows have been sewn and laid to the side, it is time to sew them together. Once first two rows have been sewn to each other it should look something like this:

First, you will want to grab Row 1 and Row 2.

Lay {Row 1} face down with the back facing up. Now put {Row 2} on top of  {Row 1} the WRONG sides together. {Back to Back}. As you put them together, make sure you are lining up {Row 1, Square 1} with {Row 2, Square 1}. It would be a pain to sew it on backwards and have to rip it apart and start over.

Start with the first seam on the row. It should be the one that connected {Square 1 and 2} together on {Row 1}. Line it up with the same seam on {Row 2}.  Remember they have their backs facing each other.

You should now have WRONG sides facing each other, seam lined up, and a flap facing out on both RIGHT sides or your fabric.

Think about how your material is going to go through the machine when you sew. On that side that faces down toward the machine you will want the flap pointed down and the side that is facing you, you will want the flap facing up. This way you don't have to worry about which direction your flap is going while sewing. The flap on the back will always be down and the flap on the front will always be up.

If the machine catches the flap that is facing up, you will be able to correct it before it sews it down. It would be really hard to catch any errors if the flap was on the back. This just makes it easier as you go along.

It is time to pin. Seams are lined up, flaps are in the correct direction, pin. I used one pin for each side of the seam on the flap. Go all the way down your row and do the seams this way. Once you have those pinned you can go back and line up the edges and pin them. I skipped that step, but I wouldn't advise doing that.
Here you can see that once I got my rows under the machine, I had my flap on top facing up.

This also helps because your machine is only going through six layers of fabric at a time rather than the eight it would have to go through if the seams were going the same direction.
Sewing across the seam.
Your machine may grumble and growl. You may break a needle. You WILL break your thread. Just be patient and go fairly slow. It will work. Trust me. If Ol' Gerty can sew through all that, your machine can too.

You will want to sew your rows like so..
Sew
{Row 1} to {Row 2}
{Row 3} to {Row 4}
{Row 5} to {Row 6}
{Row 7} to {Row 8}
{Row 9} to {Row 10}

Then you can go back and sew {Rows 1 and 2} to {Rows 3 and 4}.  Now sew {Rows 5 and 6} to {7 and 8}.  Then sew {Rows 5, 6, 7, and 8} to {Rows 9 and 10}.

Finally you will sew {Rows 1,2,3 and 4} to {Rows 5,6,7,8,9 and 10}

This just seems to make it easier with less bulk on your machine.

MAKE SURE YOU ARE SEWING THE ROWS TO THE CORRECT SIDE AND THEY ARE TURNED THE CORRECT DIRECTION.

As you start to get more than two rows sewed together you will notice that your flaps look odd. I have an example photo below.
It is OK that one side is facing down and one side is facing up. We will fix that when we are snipping. It will free up when snipped. Don't stress!

Once all your rows have been sewn together; your quilt should look something like this:
Thanks for following along!

In Part 5 we will cover sewing a seam around the outside of your quilt, snipping, and washing.

Good luck and please share your work with me.

Denim and Homespun Rag Quilt Tutorial Part 3

{Nifty Thrifty Denim Rag Quilt Tutorial Part 1}
{Nifty Thrifty Denim Rag Quilt Tutorial Part 2}

Part 3

Hey y'all. It is me again! I hope you have been enjoying the tutorial so far and have been able follow along with my craziness and actually learn something.

We are moving right along with this quilt as it is time to get down to the nitty gritty: sewing the squares together.

First and foremost, you will want to have your squares in perfect order within the stack for each row. Your top square should be row one, square one. The last square of row one should be on the bottom. If you have ten rows, you should have ten stacks.  If you have labeled your pieces, this should be a breeze.

Now, take your {row one, square one} and {row one, square two} off the stack.
Take the right edge of square one and pin it to the left edge of square two with their WRONG sides touching.
You COULD also pin all the squares together in a row like the next two photos and then all you have to do is sew, sew, sew.
I found sewing the edges with them pre-pinned was a little too difficult. So I decided to do it *MY WAY*. See, I told ya I am a rebel. I'll show you how to be a rebel too. Here is how I did it.

Take your {row one, square one} and {row one, square two} off the stack.
Put the WRONG sides together.
Even up the edges.
Pin and sew down the edge and sew.
Be sure to backstitch at the beginning and end.
Once it is sewn it should look like this. Some people go over their stitching a second time. You can if you want. I didn't.
Now that you have those two sewn together, spread them out flat so that they are in the correct order. Repeat the process with the {row one, square two}'s right edge being sewn to {row one, square three}'s left edge. Continue to do this until you have them all sewn together with their seams facing toward the front.  
Once you finish each row, lay it to the side and start on the next. We will work on connecting the rows in Part 4.

Sorry if that was confusing. Good luck! Let me know how it goes.

{Nifty Thrifty Denim Rag Quilt Tutorial Part 4}

Denim and Homespun Rag Quilt Tutorial Part 2

{Nifty Thrifty Denim Rag Quilt Tutorial Part 1}
 
Part 2:
 
Hey y'all. I'm back!

Did you enjoy Part 1 of my Nifty Thrifty Denim Rag Quilt Tutorial? How many of you were inspired to attempt your very own rag quilt? Lots I hope!

Remember when I mentioned my original sketch?
Here she is:
Isn't she a beauty?!

By now you should have all your squares sewn with X's in the center. Let's move on.
Alrighty, it is time for the REAL fun to begin.

Grab a broom or vacuum, and clean your floor! What on earth does your floor have to do with a quilt? Your about to find out. Just do as I say.

Now that your floor is clean.. get yourself some knee pads, Tylenol, a bottle of water, and slap on some extra deodorant. OK, so I was kidding about the knee pads and Tylenol, sort of. But you really may want to take heed to the deodorant part.

Gather up your squares and start laying them out on the floor. You need to see what order the pieces will look the best in. Arrange, rearrange, and rearrange again.
{Just ignore the fact that my house is a mess in these photos. It was a busy, busy, busy weekend. Oh and pretend Michael's nasty grass mowing shoe isn't in the pic.}

Here is what my quilt looks like after I have laid out all of my squares and rearranged them at least twenty five times.

My main goal was to spread out the colors and not have any of the same pattern too close together. I originally planned to alternate dark denim, light denim, dark denim in each row, but it just didn't look right. I ended up doing a row of light denim, then on the next row I did dark denim. Repeating that over and over.

One thing I noticed right away when I started to lay out my denim squares is that you need to make sure your that all of the denim have the grain going in the same direction. It will look better if they all match.
The last step in Part 2 of this Nifty Thrifty Denim Rag Quilt Tutorial is labeling. Grab a marker and some post-it notes; stick a note or piece of paper on each square and label it with what row number and piece number each square is to be. {After some trial and error I found that even the sticky notes will need a pin eventually} I just scribbled R1P1, R1P2, and so on. This will make sorting them out a lot easier when you start to sew them together.
 
That is it for part two. I'll updated with part three as soon as I can! Good luck.
Be sure to let me know how it goes for you.

{Nifty Thrifty Denim Rag Quilt Tutorial Part 3}